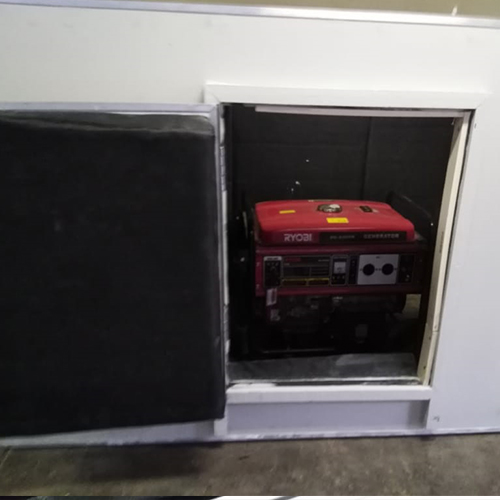
Do you use a generator at home, camp, or work to power tools, lighting, or for emergencies? Listening to it roar for hours can be nerve-racking. So can be the complaints from family and neighbors. Have you considered building a soundproof generator box?
A soundproof generator box should suppress the noise from a generator from 85dB or 90dB to levels closer to an inverter generator between 43dB and 56dB, or less.
What to Consider When Designing the Generator Box:
Building a soundproof box for a generator needn’t be difficult or impossible. Once you determine whether it will be a permanent, portable, or collapsible structure, you’ve made a good start.
The dimensions of your gen-set help to identify the minimal size required 25cm or 30cm around each of the sides and top should be added for your interior dimensions. Now you’re ready to look at building materials, which also depend on what your structural plan looks like. The materials should help stop the sound, not create an echo box.
• Our acoustic board for blocking more sound, the thicker, the better at blocking noise.
• Acoustic caulking at seams and corners will further block noise.
• Soundshield insulation for sound absorption
• Mass Loaded Vinyl (MLV) is also a great liner for the box, the thicker, the better at blocking noise.
• Duct pipe and ventilation materials for air intake, cooling, and exhaust.
The design and function of the generator box will identify other materials that may be needed, including hinges, receptacle boxes, and aluminum edging.
7 Essential Criteria When Designing the Generator Box:
When designing the soundproof generator box, there are seven primary criteria that the Soundproof box should have.
When designing the soundproof generator box, there are seven primary criteria that the Soundproof box should have.
1. The soundproof generator box must decrease the generator noise by at least 70% or more. Surpassing the 50% noise reduction level can be achieved by following the instructions ahead in building your generator soundproof box.
2. Since the soundproof generator box will only be used during extended power failures, it must be capable of being disassembled for storage in the minimum amount of space.
3. The box must be quick and easy to assemble and disassemble without the use of screws.
4. The mating surfaces of the parts must be airtight to prevent sound leakage.
5. There must be air intake and output ports to allow sufficient cooling.
6. The soundproof generator box must be able to run the generator in the carport out of the rain; And without anyone, including neighbors, being exposed to high amounts of carbon monoxide.
7. The soundproof box must be a modular design that allows flexibility to install different types of sound baffles and fans.
Step 1 – Measurements
The very first step you want to begin with is by measuring your generator or air compressor, whichever you want to build the box for.
You will need to leave a few centimeters on each side of the box to be able to handle the Soundshield insulation thickness, and the ventilation properties. By doing this, you minimize the risk of cutting the acoustic board the wrong size.
You should also take the measurements into account If you want to use this soundproof box to be able to accommodate more than one different appliance. Some people have a generator, a compressor and even a pool pump they want quiet
Step 2 – Cut the Sides and Top of the Soundproof Box
Cut out the Mandi Acoustic Board as per your measurements using a grinder or circular saw. You should label your four wall pieces and your single top piece with a pencil, so there’s no confusion later.
Step 3 – Make Holes for the Ventilation
Measure the diameter of your ventilation ducts, and mark two circles on the acoustic board to cut. The ventilation ducts has to be on the shorter sides of your enclosure. Lay the quiet box pieces out on your flat workspace with the four walls surrounding the top.
Step 4 – Glue and Caulk a Layerof Sound Deadening Insulation
The key to sound insulation is by adding a layer of free space that allows the sound to dissipate. The best way to deaden the sound inside a soundproof generator box is by adding one layer of Soundshield insulation 100mm thick deadening material.
Step 5 – Time to Assemble the DIY Soundproof Generator Box
It’s time to assemble your DIY soundproof generator box enclosure finally! One by one, attach all four walls using hings or screws. At Mandi Acoustics we use hinges in case you want to modify the soundproof box in the future or merely disassemble it for space saving needs. Lastly, attach the top of the enclosure and securely hinge it down.
Step 6 – Installing the Ventilation Ducts to Your Soundproof Generator Box
It is imperative to supply air and proper ventilation to the inside of your DIY generator soundproof box. The generator will need adequate ventilation to properly function and to avoid overheating. Combustion is impossible without air, and a lack of air will cause the generator to overheat to potentially dangerous levels.
When venting exhaust from a soundproof generator box, use venting ducts with lots of bends in them; since sound waves travel in a linear path, bending and curving will cause the sound to lessen.
Thread the hoses into the holes you cut earlier and then secure them in place. A small vent should be placed over these openings as well.
Conclusion
If you’re still having problems with a loud generator then consider our soundproof generator boxes, oh, and their also very affordable.
Building your DIY soundproof box for your generator is a lot complicated than buying a professionally made soundproof box. I hope you found this article of great use in your DIY efforts. Please let us know in the comment section if you completed your soundproof box and what are your impressions. Also, let us know if you built the box differently and how it works.


FOR MORE INFORMATION ON GENERATOR SOUNDPROOFING CALL US ON 087 510 7771 or Contact our sales team
© 2019 Mandi Acoustics. All rights reserved | Design by IDH.